Showing posts with label ribbon. Show all posts

Monday, April 21, 2014

Key Chain Wristlet Tutorial

Update:
Embroidered key chains now available! Click here

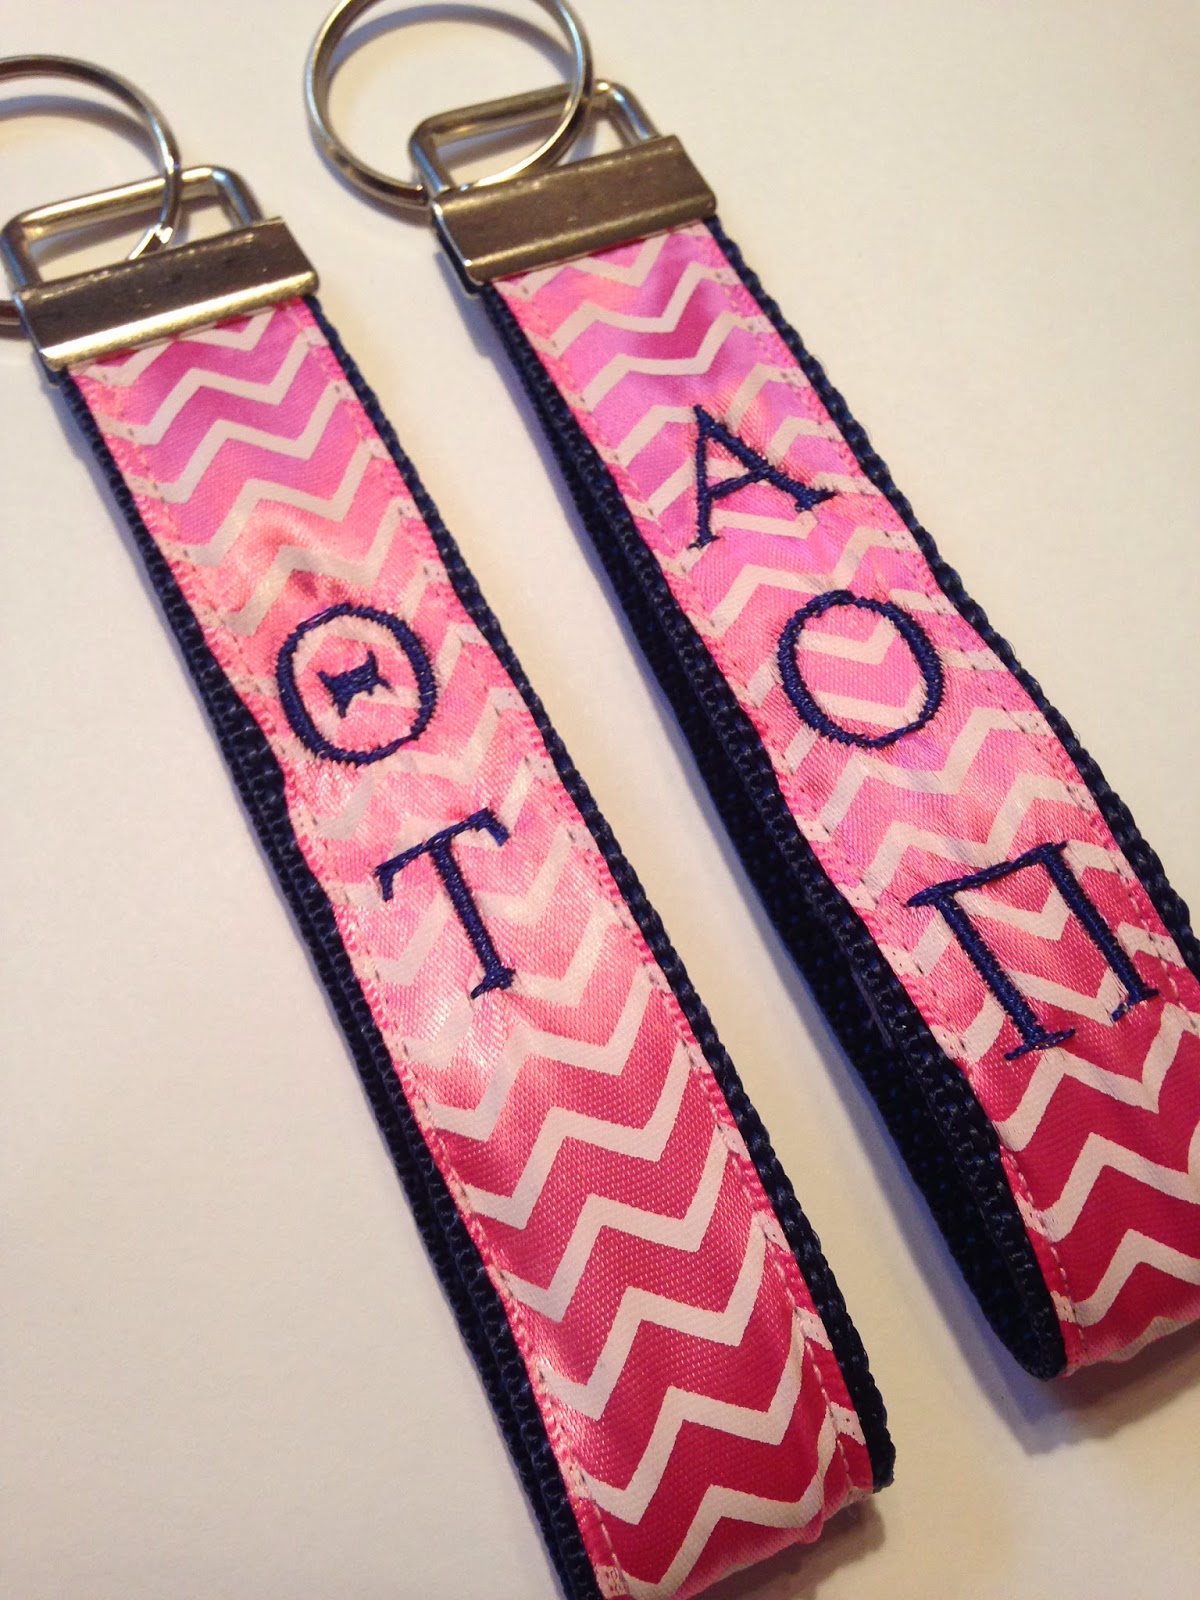
Today was a great day!  Wanna know why?  Because I finally got all of the supplies I needed to make these adorable Key Chain Wristlets!  I found my inspiration from Prudent Baby a while ago and loved the idea!  About a week ago I got around to ordering some sets of the hardware.  10 sets on Amazon.com for $4.25!  They came in the mail on Friday :)  Then today I went to Walmart to get some cotton webbing and pretty ribbon.  After finding plenty of those items and much more... I got to sewing!

So there are my first two!  I have enough supplies to make 10, so expect to see more in the near future!

Here is how you can make one for yourself!
Step 1. Get the materials: 1 set 1" key fob hardware (includes the clamp and the ring), 10 inches of colorful 1" wide cotton webbing, 10 inches of pretty ribbon (less than 1" wide)

Step 2. Sew the ribbon down the middle of the webbing.  This isn't too difficult if you use your pins and go relatively slowly, making sure you are staying in the middle the whole time.

Step 3. Fold the now beautified webbing in half (with the ribbon facing outwards) and trim the ends so they are even.

Step 4. Insert the ends into the clamp and use pliers to squeeze it shut.  Hint: Make sure your pliers are smooth or you make them smooth with duck tape so as not to damage your clamp.

Step 5. Add the key ring and that is it!  Super easy, super cute, and super useful!  
Gotta love it!  If you love them too, buy them! Here :)

Below are most of the supplies you need, can't get much easier right?


More Updates!  These are the some of the many combinations you can make!  Find them here on Etsy!


 See how many options there are to choose from?!?! Crazy right?
Webbing Options:

Ribbon Options:


Check out my store, Precious Prep, here, on Etsy.com!


Have a Kraftie day!

Don't forget to check out the separate listing for Greek letter keychains too!


Thursday, November 21, 2013

Fall Wreath Tutorial - Burlap Wreaths

Have you seen the prices they charge for burlap wreaths in stores?! They must be crazy because I made two wreaths for under $20!

And now I am going to teach you to do the same!  So the first thing you need is a bunch of Michael's coupons... no one likes to pay full price, am I right?


I don't have my receipts any more but as I remember the two wreath hoops were about $4 each (before coupon), then the burlap rolls were $4 each(before coupon) (I only needed two!), the felt leaves and ribbon I honestly don't remember the price but I do remember that they were already on sale, so no coupon required!

I searched all over Pinterest to try and find a good way to do the burlap and I didn't really find a great tutorial.  Now you are probably expecting me to therefore give you a great tutorial on how to do it but... I can't say that I could.  What I can tell you is that all you have to do is weave the burlap ribbon in and out of the wires on the hoop.  Thats pretty much the best and only way to describe what I did.  It takes FOREVER at first because you have to pull 15 yards through each time, but it gets easier about half way through and in the end I think I did both in less than 2 hours.

After you have your burlap all poof-ed (is that a word?) and looking the way that pleases your preference, you can tie off the extra burlap that is left to make the hanger hook part.  Again, I can not think of a fabulous way to describe this process.  I just messed around with it until it looked right!  One hint though: make sure that you make the second one the same length as the first one! Otherwise your wreaths will not hang evenly.  I used a bit of hot glue to secure the ends.  Be EXTREMELY careful doing this, hot glue goes straight through the burlap so wait a few seconds before pressing anything down to avoid hot glue-ing your fingers!

Now let your imagination run wild!  If you like the way my wreaths turned out, which I really hope you do, keep reading!  Otherwise, share what embellishments you're using with me in the comments! :)

I purchased two bouquet things of leaves at Michaels, half of them were regular fake leaves and the other half were kind of a felt material.  I loved the way the felt ones looked so I only used those.  For the bows, I used about 6 yards of ribbon each!  I had never made a bow from ribbon before so yet again I don't have step by step instructions for you, sorry about that!  But if I can figure it out, so can you!  The ribbon I had had wire in the edges so that helped a lot to keep the shape of the bows.  I would suggest getting a similar ribbon if you aren't a bow expert, like me.  Just work that ribbon until it works for you!

Then I just used hot glue to get everything on there!  It helped me to lay them both out before glueing so that I had an idea of where everything would go before committing to it with the hot glue.

Finally give them to your mom as a surprise when you come home for the weekend! ;)

Thanks for reading!
Pinterest
Etsy
Facebook


Wednesday, October 2, 2013

Littles!

No I'm not in a sorority, I'm on a dance team!  And we have bigs and littles.  This is my first time as a big and it is very fun!  I LOVE making things for people and giving it to them!  It is so much better than getting a gift to me.

I made several gifts as well as bought a few, but I am just going to cover the ones I made on here.
So I didn't intend to necessarily write a post about this so don't hold my pictures against me :)


This was the first gift they received (the dance group is called Extreme, fyi). I picked the colors based on what my littles said their favorite colors were.


These were the gift bags that I had for them, I got them from Michael's! Super cute colors and patterns.


These are their final gifts! Each one will get a shirt and hanging plaque.  I rolled up the shirts so that they would be a surprise and tied 'em up with pretty bows.  Note how the colors of the letters match the chevron frames :)

Here is another picture of the plaques. These were really fun, easy, and cheap to make!  I got the plaques ($0.97 ea), letters ($1.77 ea), and ribbon ($1) from Walmart.  I painted them and Mod Podged a piece of scrapbook paper on, then hot glued ribbon for a hanger.  I added the bow as a last minute decision and I'm so happy I did!  What do you think?

Here are some really bad pics of the shirts I made!  The pics don't do them justice, I tell you!  I embroidered the white letters onto the black fabric and then sewed the squares on using a zig-zag stitch.

For the front I embroidered their initials onto the same black fabric and created a pocket!  They turned out so cute I think!

What have you made for your littles?


Sunday, September 2, 2012

Gift for Mom

If you are like me then your mom is the most important person in your life and your best friend!  One of  the greatest things about crafting is making things for others.  And who better to make something for than your favorite person?

So with my inspiration from Deal Wise Mommy and a few minutes of free time I was ready!  The gift would be a Post-It note holder, made from an inexpensive frame, some scrapbook paper and embellishments, and a pad of sticky notes!  So simple yet actually useful and all moms love anything you make for them :)

So here is my result:
 What do you think?

All I did was:

1. Select coordinating sticky note pad and scrapbook paper
2. Cut scrapbook paper down to size
3. Add 'mom' sticker embellishment to the top of the scrapbook sheet
4. Put paper behind glass
5. Glue sticky note pad to the glass
6. Tie a pretty ribbon on and tape into place on the back

Voila! A really simple gift that made my mom so happy!  I'm sure she will display it proudly on her desk at work (I hope!)

Why not take a few minutes to do your favorite thing, craft, for your favorite person?  It is the little things in life that make it worth living so make someones day, it is as simple as that :)


Have a great and safe Labor Day!